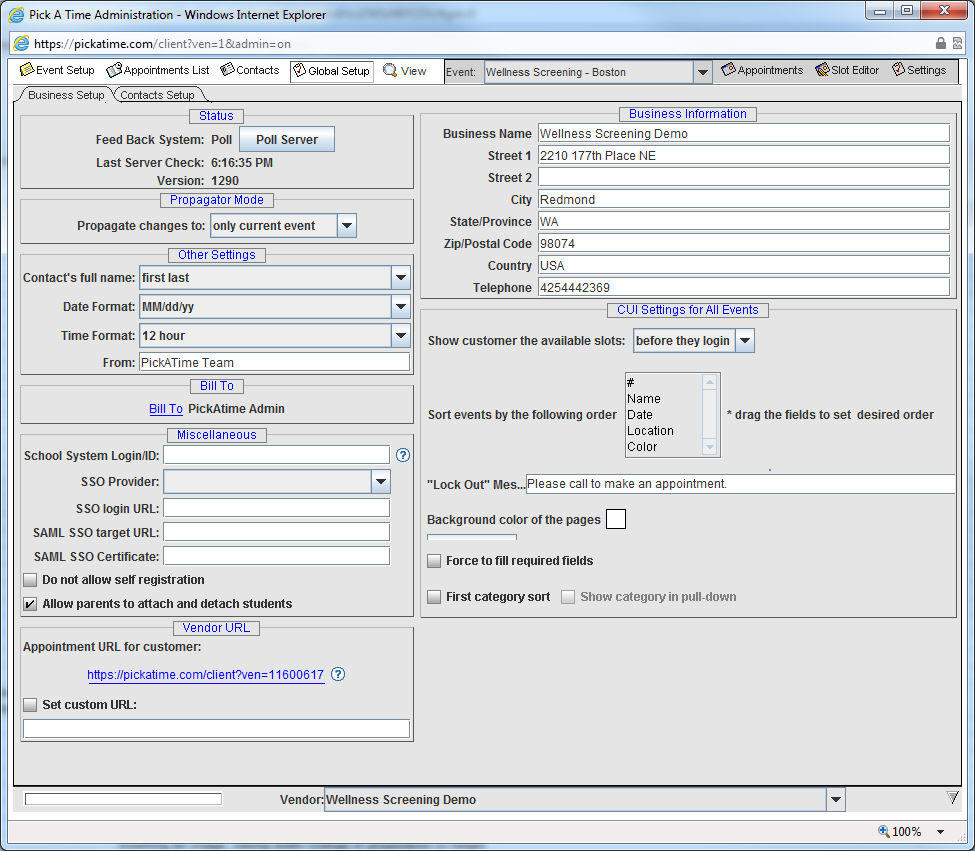
The Business Setup tab shows the company information you entered when you signed up for your pickAtime account.
This setting allows you to make a change to one event propagate to the other events automatically. When set to "all events of this type" this feature will copy changes to all the other events. Note, that this will only copy settings made from the UI Setup, E-mail Templates, and CUI Messages tabs, and it will only copy the value when it is changed. In other words changing this setting will not make the events identical. You still have to go and alter each setting to force it to propagate to the other events.
School System Login/ID: This setting is used for our Single Sign On customers.
SSO Provider: If you will be providing a Single Sign on option for your customers you would want to select your SSO provider from the list.
SSO login URL: If you have selected an SSO provider from the list above enter in your company or school website URL here. When a customer is timed out of the pickatime system they will be directed back to this URL.
Do not allow self registration: Check this box if your customers will be entering the scheduler from your website portal with the Single Sign On option. This will prevent them from logging into the site from outside of the portal.
Allow parents to attach and detach students: Unless you have imported parents and a parent-student relationship file this box should be checked. This allows your parents to identify their student. For the PTA product only.
Vendor URL
Appointment URL for customer: provides you with the URL for your account. Check the box "Set custom URL" and then enter in a customized URL to create your own URL.
The Appointment URL will change to reflect your selection, and the new URL will be available in approximately 5-10 minutes.
"Show customers the available slots" setting determines whether your customers can see the events and slots before they have logged in. If there is a PTA event the system will force this setting and prevent you from changing it because the system has to know what parent (customer) has logged in, in order to show the slots.
Sort events by the following order: This allows you to change the sort order if you have multiple events on your account.
"Lock out" Message: In the Contacts section of the Admin UI, you can change the default access level of Allowed to Not Allowed for any contact. The Lock Out message will be displayed to any contact where you have set this access to "Not Allowed".
Background color of the pages This setting allows you to change the background color of the pages on the CUI.
Force to fill required fields If you check this box, then administrators booking appointments on behalf of customers will be required to fill in any appointment or contact fields that you have set as required.
First category Sort The category column on the Event Setup page in the Admin UI, can now be used as a preliminary sort for your scheduler displaying first the list of categories. When the customer clicks on a category, they will then see ALL events within that category. For example, you can use this column to enter in the city for your events. If you check the First category sort box, the Online Scheduler will have a preliminary page displaying the list of categories.
Return message: The return message will display when your customers have selected a category and now need to navigate back to the initial category listing.
Select message: The select message will display above your listing by category. For example, you might fill this in with the following: "Please select your city from the list."