Category Options
Function
The Category Sort option allows you to display your events by category, instead of all at once. This helps your participants navigate your account (especially if you have a large volume of events) with ease. It can also be used to direct participants to a certain event without an option to toggle to the other open event on the account.
Location
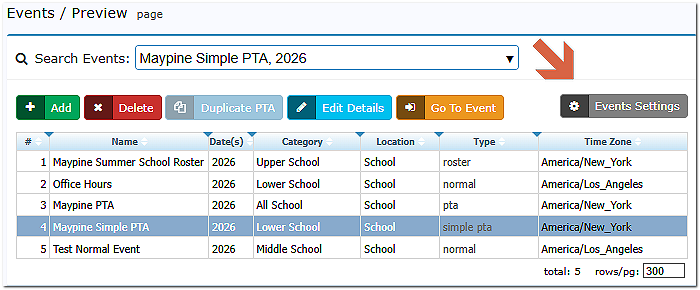
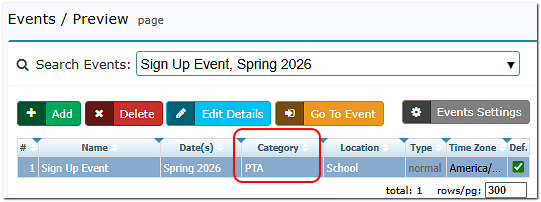
On the Events Preview page, you will see the grey button Event Settings. Click on the button to access the settings and the category sort.
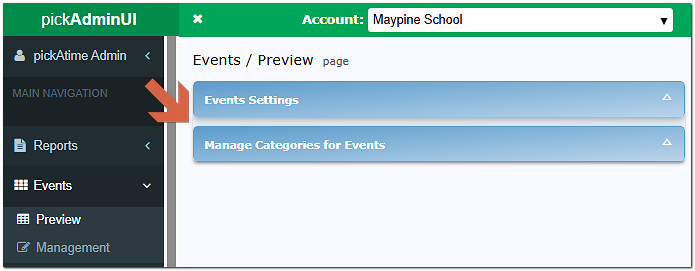
At the bottom of the Events Settings page is the Category Sort section (the page may be collapsed and expanded when you access it)
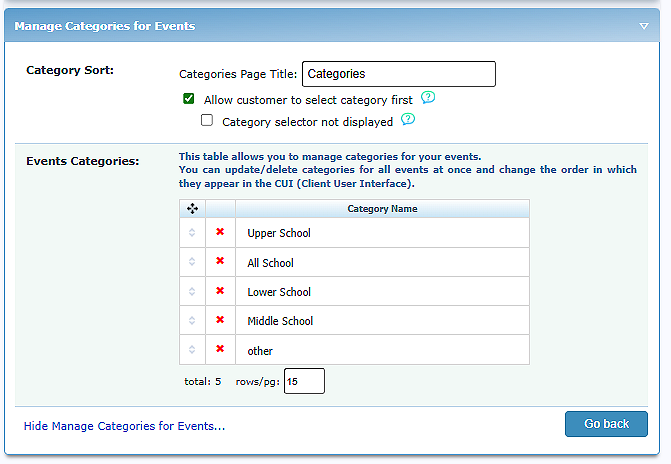
Manage Categories for Events
This area allows you to show your events by category, instead of all at once. This may help your participants navigate your account (especially if you have a large volume of events). Below are the areas of this section.
Category Sort
|
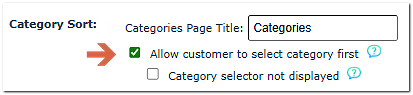
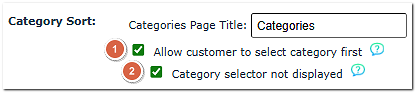
Categories Page Title: |
This feature allows you to name the Categories page |
|
Allow customer to select category first |
allows you to have an initial sort on your account before the events are displayed. |
|
Category selector not displayed |
allows you to create a URL based on the category you entered in the Category column for your event(s). |
Events Categories
This table allows you to manage categories for your events.
Ways to Use
Display all events by category
To have your participants use the account URL and then see all of the events. Add the category for each event on the Events Preview page.
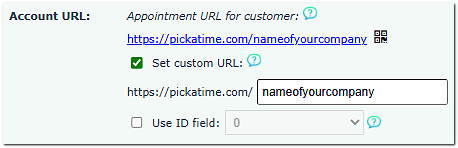
On the Global Setup / Business page, create a customized account URL for your company, such as https://pickatime.com/nameofyourcompany
On the Events / Preview page, enter text in the Category column for each event. For example, if you wanted the event URL to be https://pickatime.com/nameofyourcompany/PTA then enter PTA in the category column.
On the Events Preview/Event Settings page, go to Manage Categories for Events and click Allow customer to select category first.
On the Event Management/Settings/UI Setup tab, Scheduling Link section, you will see the Scheduling Link for the account. This is the URL you provide to your participants.

Display the events by a custom URL
You can use the Category Option if you want to direct participants to a certain event without an option to toggle to the other open event on the account.
On the Global Setup / Business page, create a customized account URL for your company, such as https://pickatime.com/nameofyourcompany

On the Events / Preview page, enter in text in the Category column for each event. For example, if you wanted the event URL to be https://pickatime.com/nameofyourcompany/PTA then enter in PTA in the category column.

On the Events Preview/Event Settings page, go to Manage Categories for Events and click Allow customer to select category first, and then Category selector not displayed
On the Event Management level, on the Settings/UI Setup tab, Scheduling Link section, you would see the Scheduling link for the category. This is the URL you provide to your participants.
