Connecting payment with Authorize.net
To accept payments via Authorize in pickAtime, follow the steps below.
Instructions for Setting Up Authorize:
- Sign in to Authorize.
- On the sidebar, navigate to the Account / Account & API Settings.
- Select API Credentials and Keys. Here you can see the API Login ID and Transaction Key sections.
- If you do not have a Transaction key, you need to select the Generate New Transaction Key button.
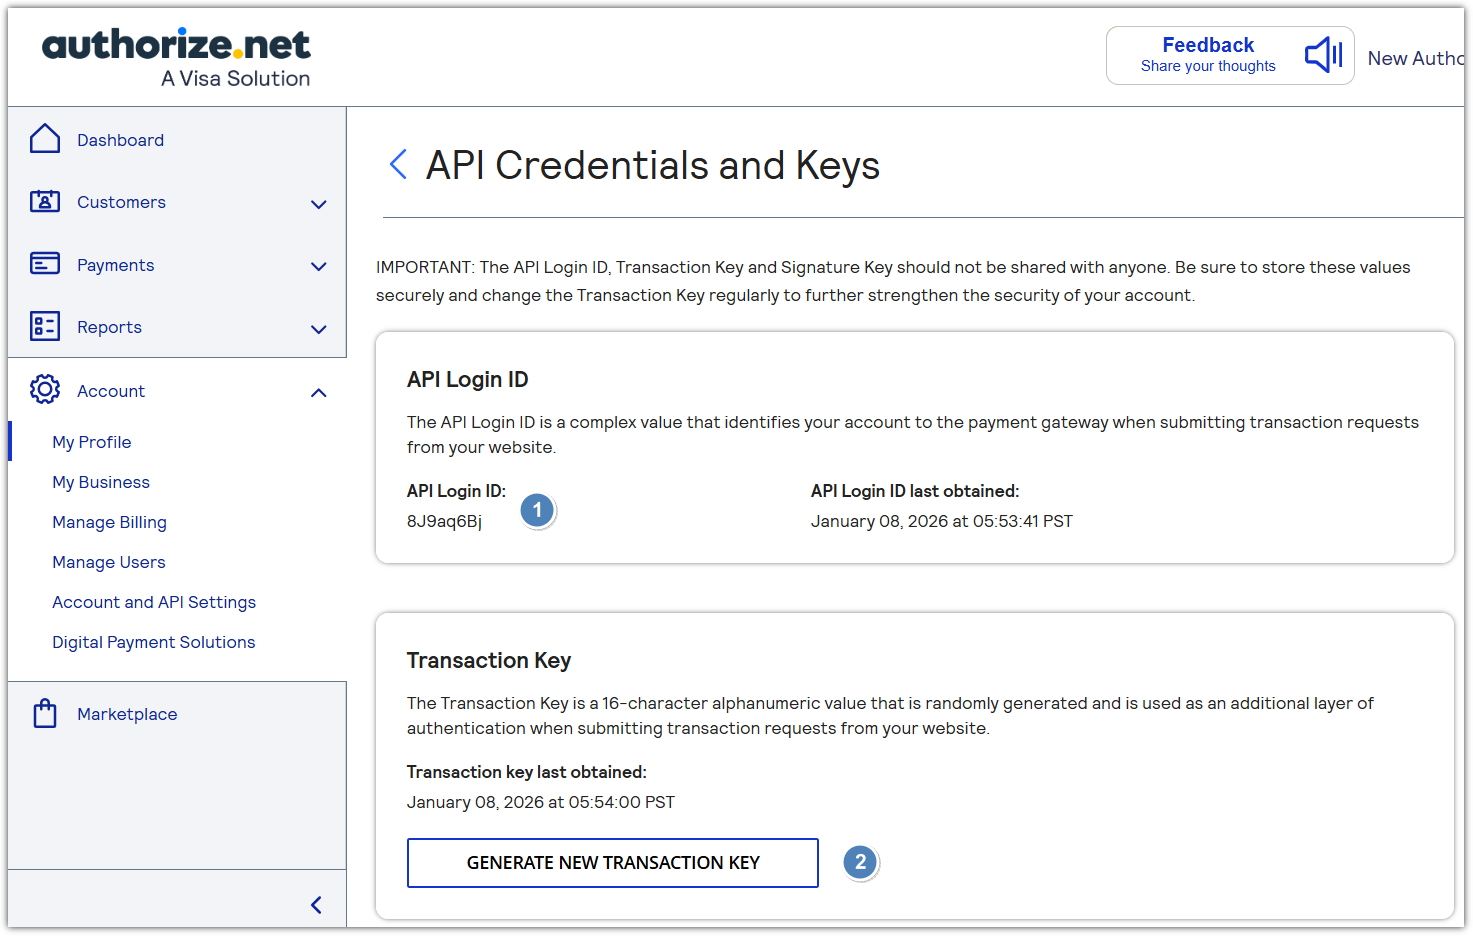
NOTE that if you already have a Transaction Key, you can use it.
- Copy API Login ID and Transaction Key.
- Configure pickAtime:
- In pickAtime, go to Admin UI / Event Management / Settings / Credit Card Setup.
- From the dropdown menu, select Authorize.net.
- Paste the API Login ID and Transaction Key into the corresponding fields.
- Click the "Check Credentials" button.
- If successful, your Authorize integration is now active.
You are now ready to begin accepting payments via Authorize through your pickAtime scheduling system.