Connecting payment with Stripe
To accept payments via Stripe in pickAtime, follow the steps below.
Note: You must have a Stripe Business account to proceed.
Instructions for Setting Up Stripe:
- Log in to Stripe using your Business account.
- In the top-right corner, click Switch live account (not Sandbox).
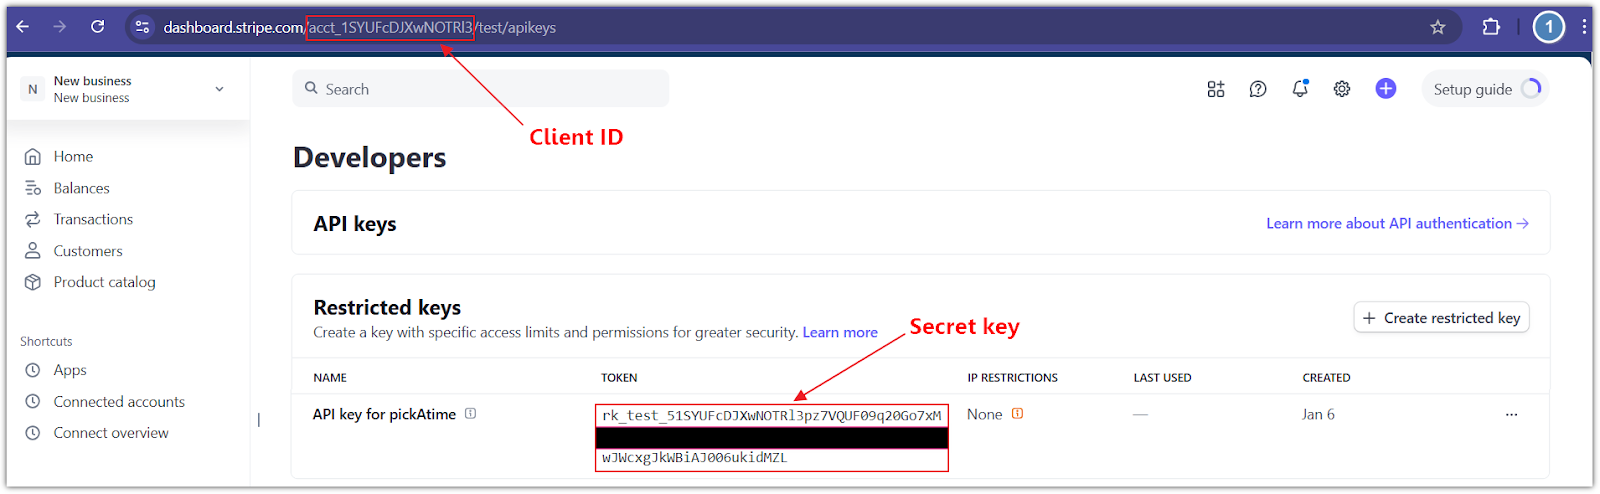
- In the bottom-left corner, click Developers > API keys.
- In the Restricted keys section:
- Click the Create restricted key button.
- Select the Providing this key to another website option and click Continue.
- Enter the Name of the 3rd-party you're giving your API key to i.e. ‘pickAtime’.
- Provide a link to the 3rd party you're using: ‘https://pickatime.com/’.
- Leave the ‘Customize permissions for this key’ unchecked and click the Create restricted key button.
- Configure pickAtime:
- In pickAtime, go to Admin UI / Settings / Credit Card Setup.
- From the drop-down menu, select Stripe.
- Paste the Client ID and Secret key into the corresponding fields.
- Click the "Check Credentials" button.
- If successful, your PayPal integration is now active.
You are now ready to begin accepting payments via Stripe through your pickAtime scheduling system.