Once you have imported your four data files you should use the Class Viewer and Class Editor tabs to confirm that your data is correct.
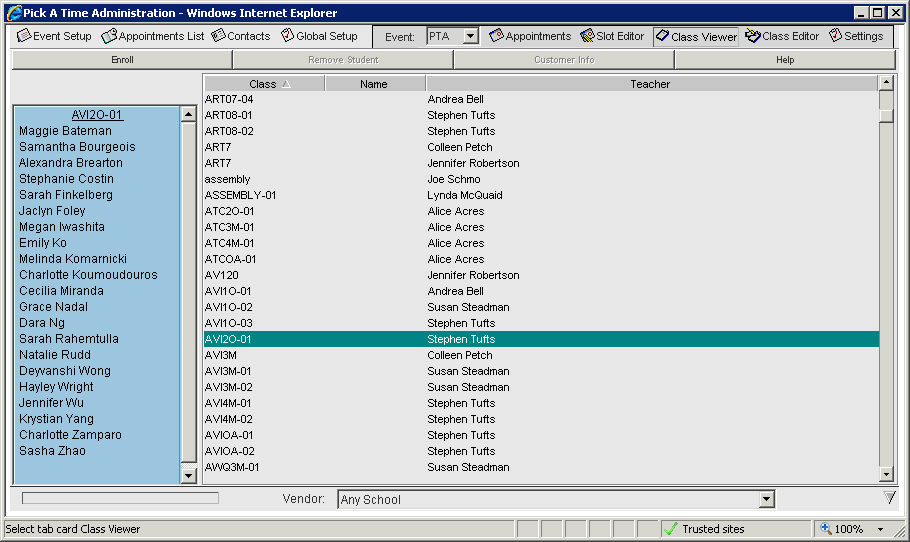
From the Admin UI, select the Class Viewer tab. This tab will display the list of teachers and classes. If you select a class name then the list of students in that class will display on the left hand side of the page. See the Modifying Enrollment Data section of the manual to add or remove students from classes.
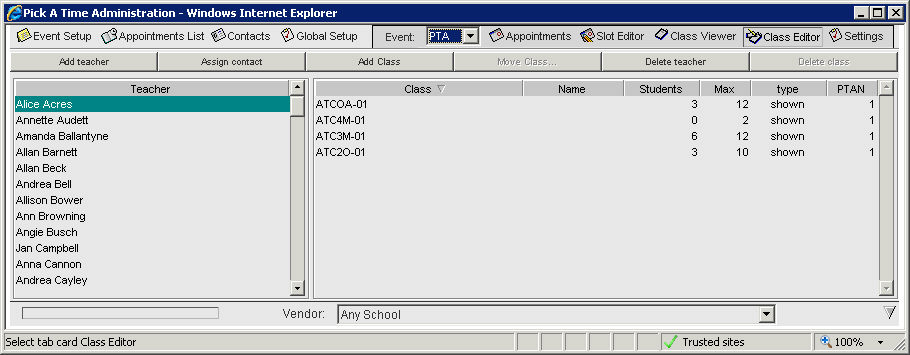
Select the Class Editor tab. This tab will display the list of teachers. If you select a teacher name then the list of classes taught by that teacher will display on the right hand side of the page. See the Modifying Teacher or Room Data section of the manual to add or remove teachers.
To view teacher and student information select the Contacts tab. The list of teacher names will automatically be displayed, and you can click to a teacher name to see more information displayed on the right hand side of the page. To view the student information, enter the student last name or first name in the Search section and select the Search button. Information on the student will be displayed in the right hand side. Alternatively, you can enter in a portion of the last name (or first name) followed by an * (ex. T*) and all contacts with a last name beginning with a T will be displayed.
When you select the Contacts button, a list of all administrators will be displayed. Once you have imported your data, teacher and student information will be available by doing a search. Once parents log in and use the site, parent information will be available by doing a search.
See also the Contacts section of the manual for more information.
Once you are satisfied that your data is correct, you are ready to Create the Slots.
If your data does not look correct, you should review the section on Dealing with Bad Data, starting with the section Three Ways to Fix It.